Unit 5: Saving and Printing Documents
Save early and save often. People often ask how long they should wait before saving—it depends on how upset you’d be to see the work you’ve done since the last save disappear! Saving is fast and easy and prevents a lot of headaches. To save a document, use one of the following options:
· Click on the File tab and choose Save
Use the Save As option to save:
· A second version of a saved document (with a different filename)
· A document to a different location
· A document as an older version of MS Word (to share with someone who has on older version of Word)
The Save As dialog box will appear.
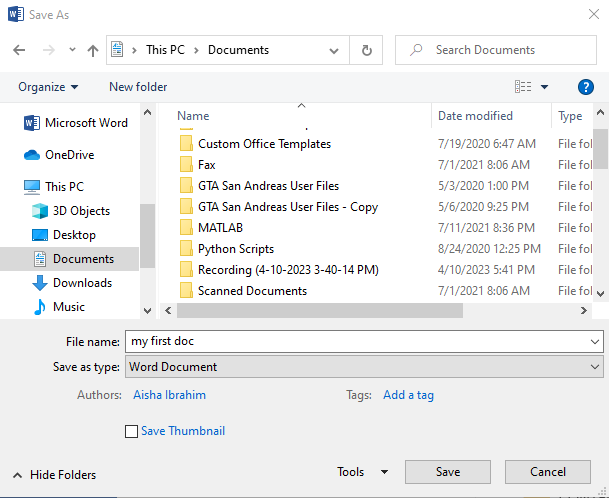
· Select the location where you wish to save the document. Enter a file name for the document, then click Save.
· Choose the file type by selecting from the dropdown box next to Save as type. The default is Word Document (*.docx), but to share the file with someone who does not have Word 2019, 2013, 2010, or 2007 choose Word 97-2003 Document (*.doc) instead.
· Click Save
Where to Save Files
Try to consistently save documents to one place so that they are easy to locate. Most versions of
Windows have a default folder called Documents into which Word automatically directs documents unless a different place is specified.
Printing a Document
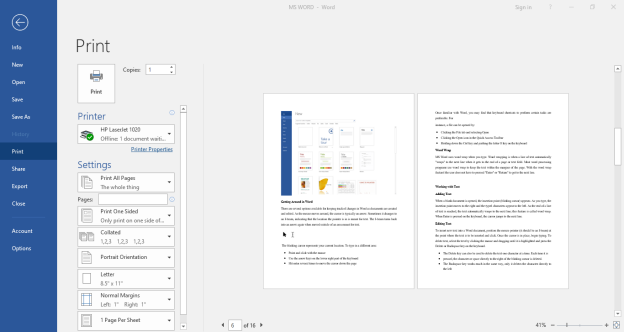
Click on the File tab and select the Print option to print your current document. This will display the Print window options, along with a preview of the document to the right, such as the range of pages to print and the number of copies to print.
To print specific pages:
· Click on Print All Pages and choose from the drop-down menu
· A specific page or range of pages can be printed by entering it/them in the text box beside Pages (e.g. 5, 1-3, or 3-8)